New Practice Onboarding SOP
GoHighLevel (GHL) — Shared 5-Practice Account Setup
Table of Contents
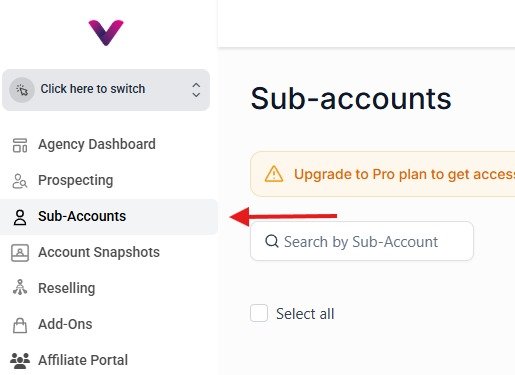
Navigate to Sub-Accounts in the Agency Platform
Log into the GHL Agency platform. In the left-hand navigation menu, click on Sub-Accounts.
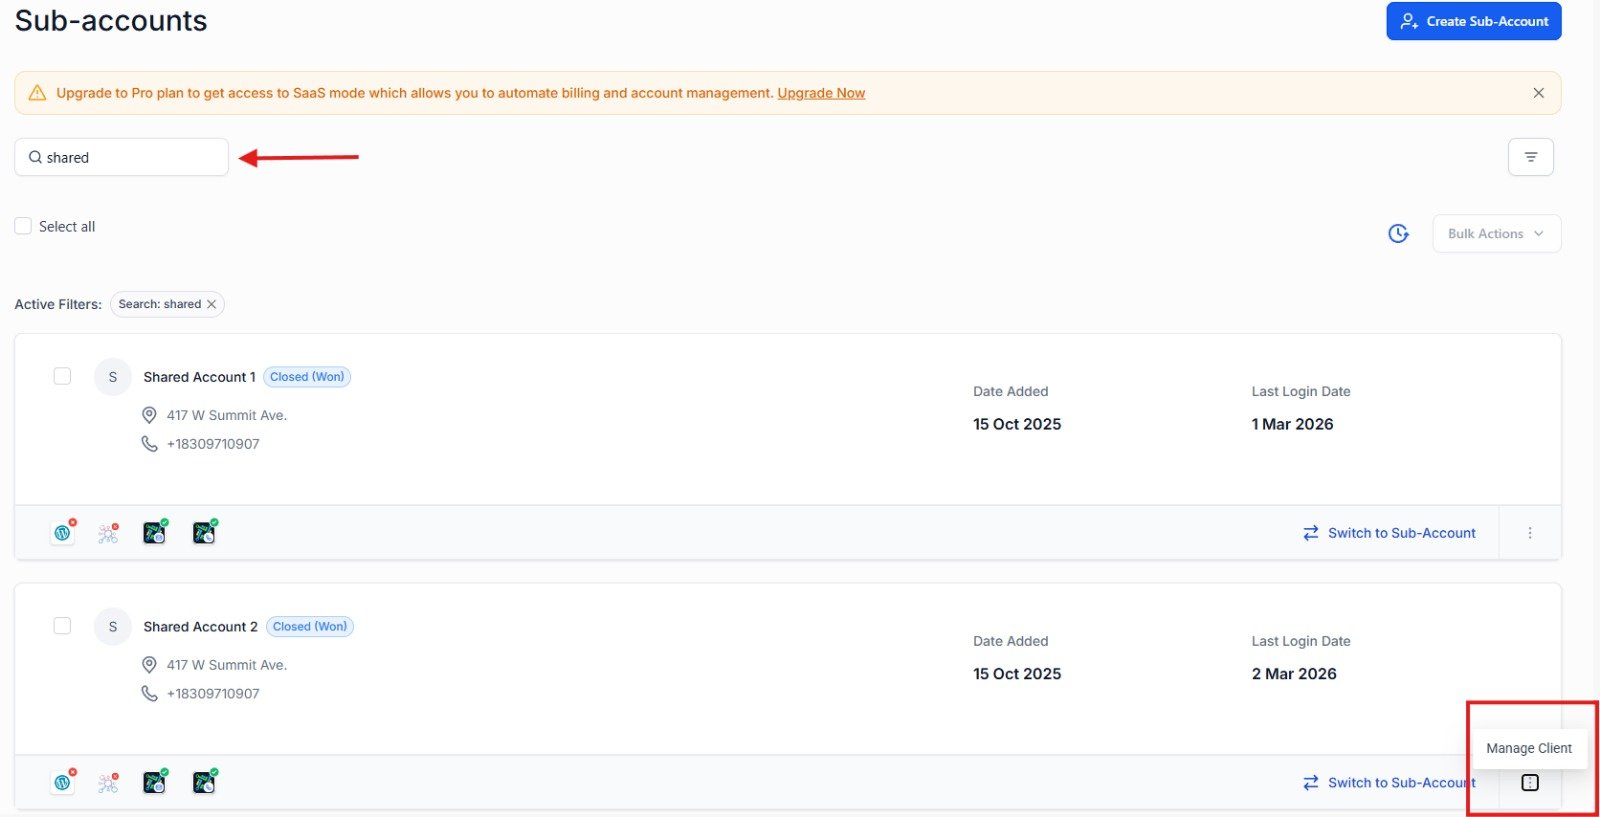
Search for the Sub-Account & Navigate to Manage Client
Use the search bar to locate the sub-account to be used. Once found, click the three-dot menu on the account card and select Manage Client.
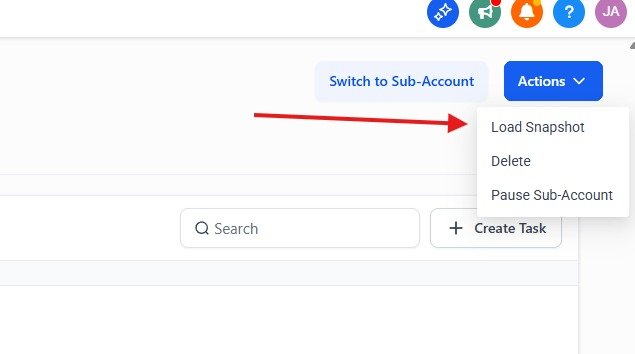
Access Actions & Select Load Snapshot
Inside the Manage Client view, click the Actions button in the upper right corner. From the dropdown menu, select Load Snapshot.
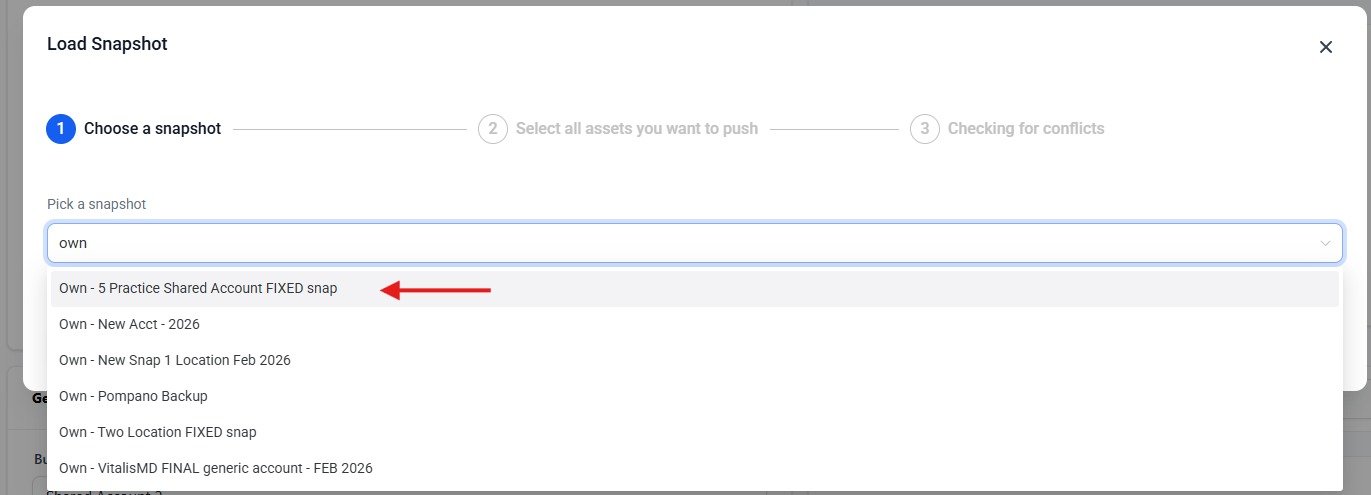
Select the Correct Snapshot
In the Load Snapshot modal, use the dropdown to search for and select the appropriate snapshot. As of March 2026, the snapshot for a shared 5-practice account is:
Own - 5 Practice Shared Account FIXED snap
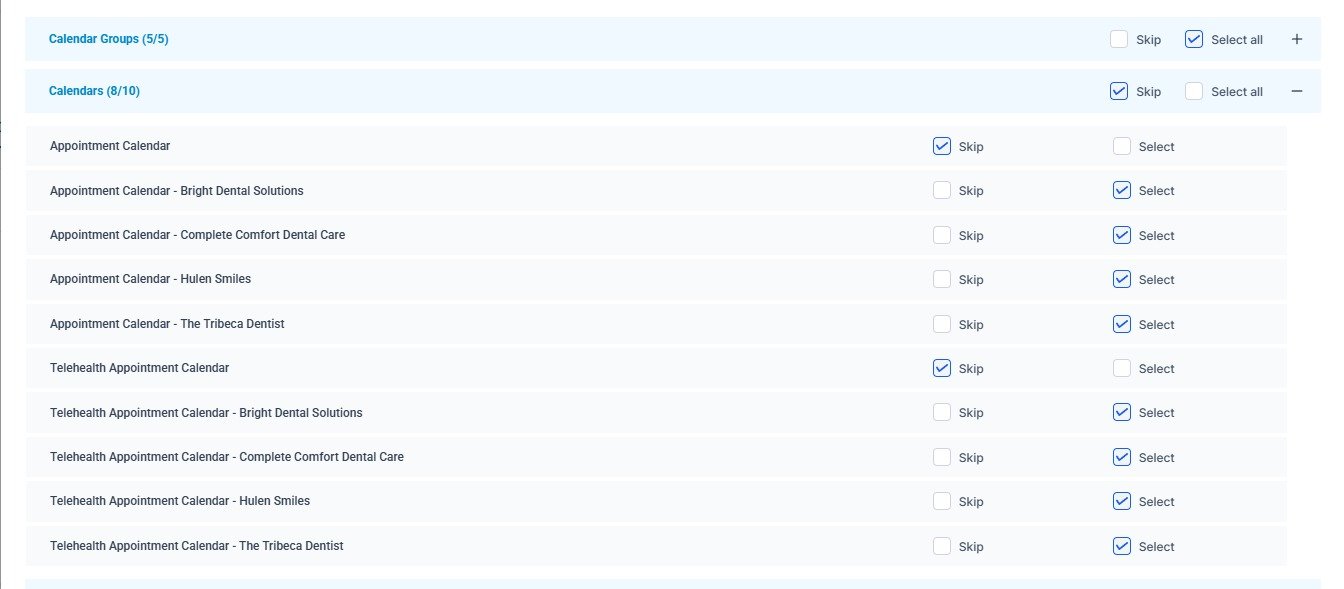
Excluding Already-Configured Assets (Live Accounts Only)
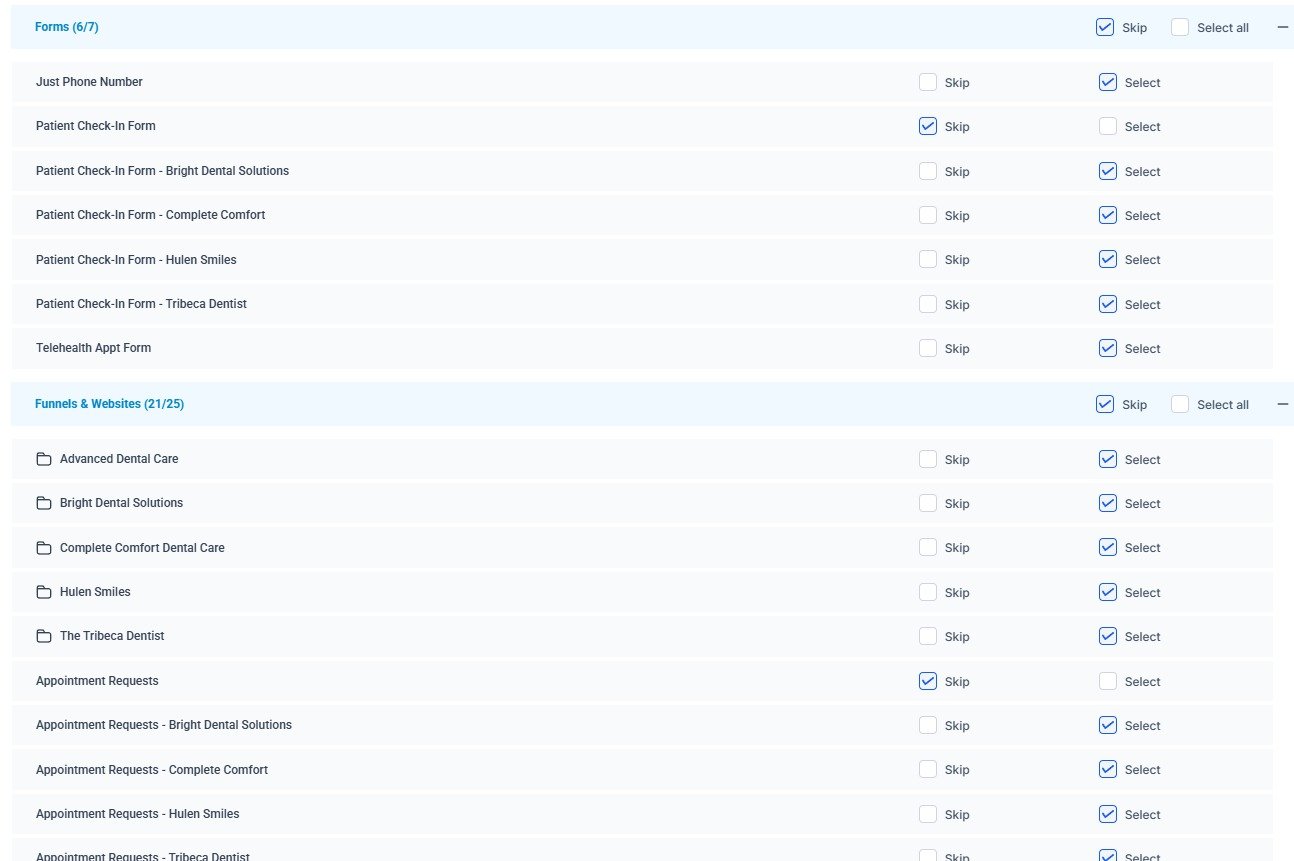
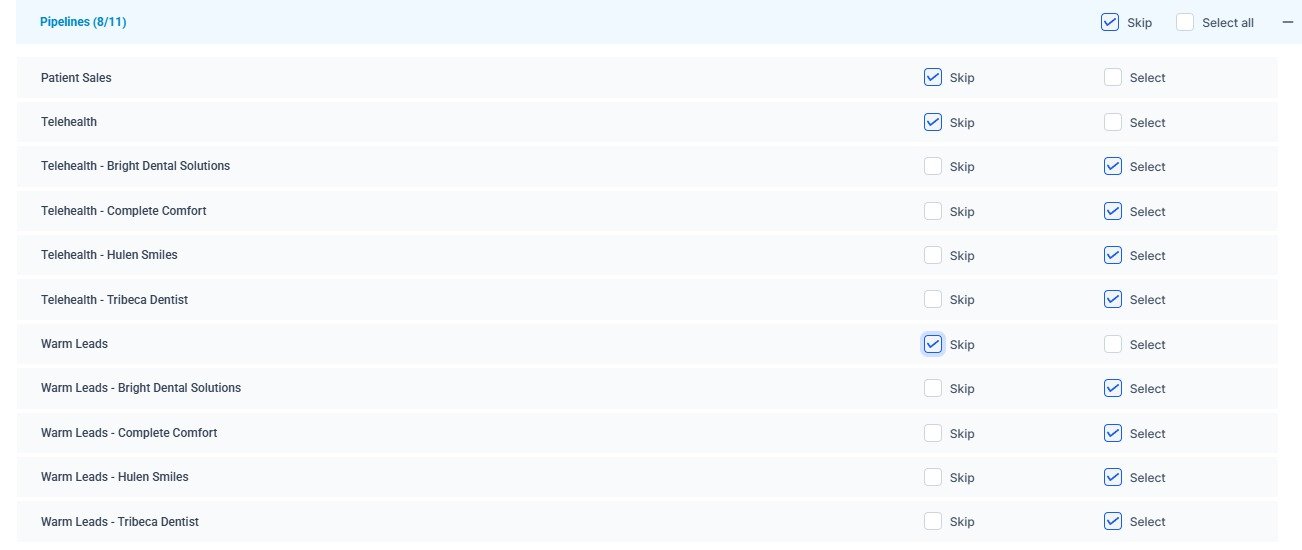
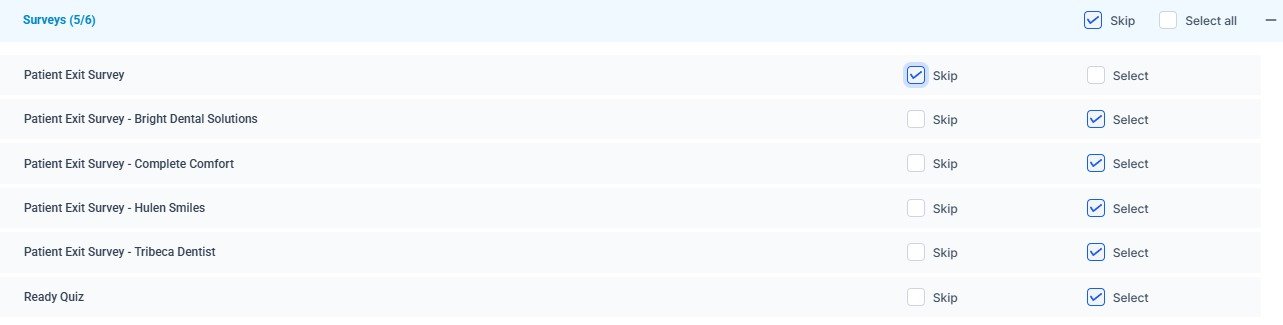
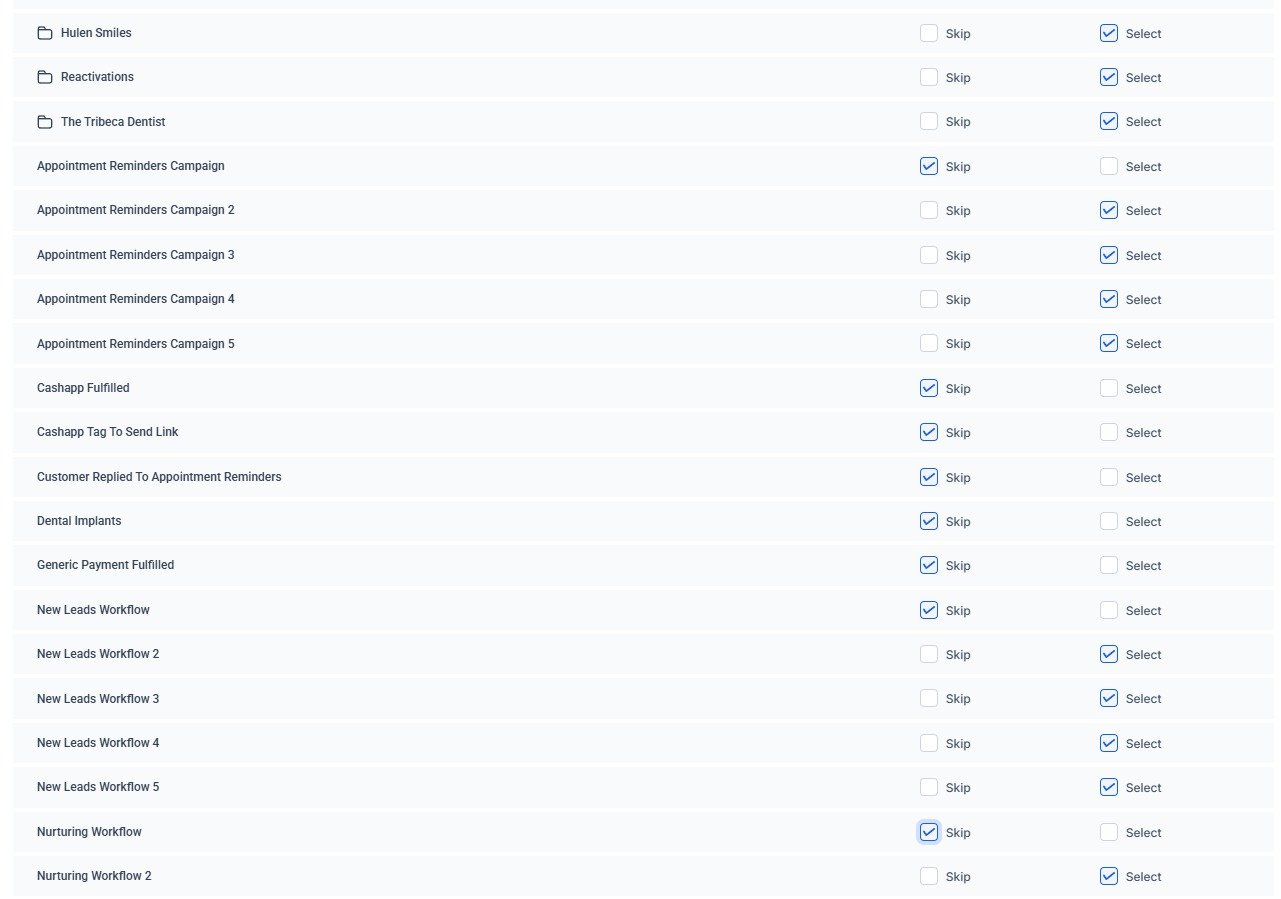
If the account already has one or more active practices, skip any assets that are already configured to avoid overwriting them. The rule is consistent across all asset types: skip items that do NOT include a specific practice name. Only Select items that include a practice name.
Apply this rule to the following asset categories:
- Calendars — Skip "Appointment Calendar" and "Telehealth Appointment Calendar"
- Forms — Skip "Patient Check-In Form," "Telehealth Appt Form," and other generic forms
- Funnels & Websites — Skip "Appointment Requests," "Reactivations," and funnels without a practice name
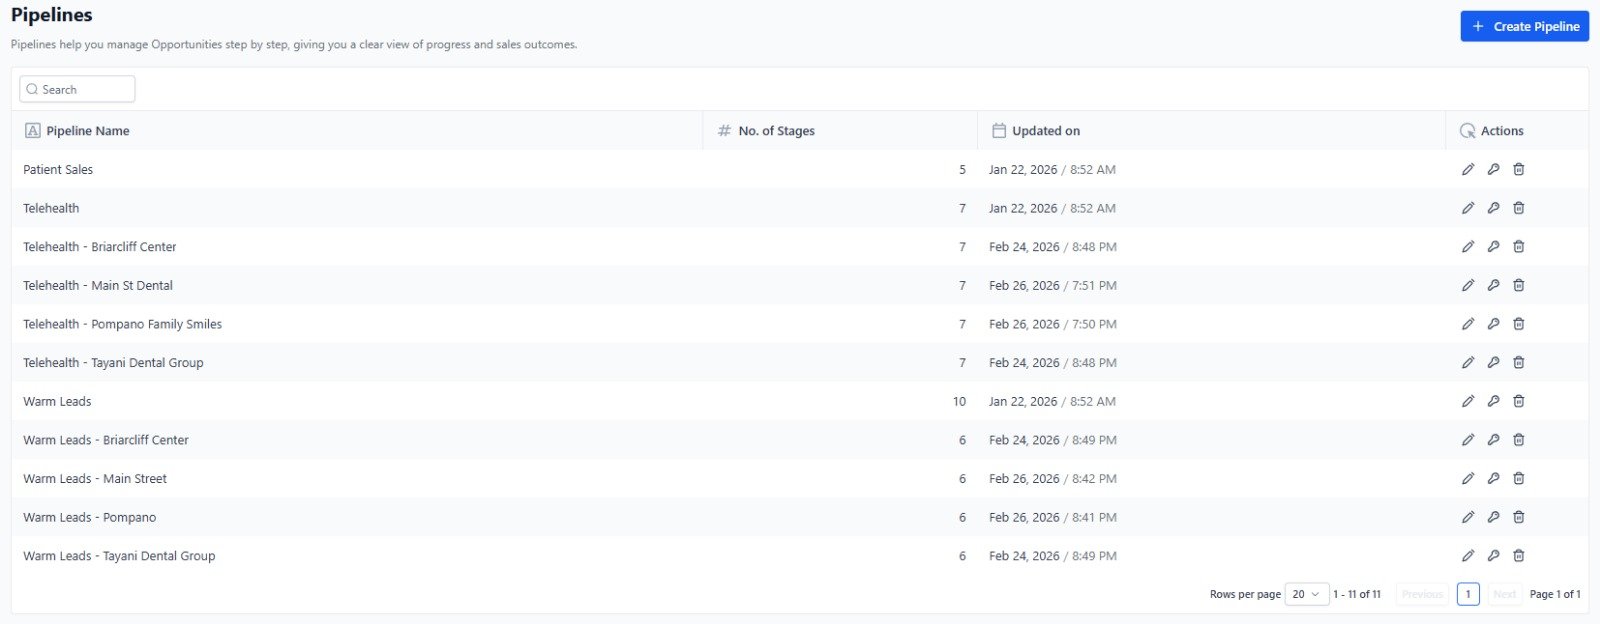
- Pipelines — Skip "Patient Sales," "Telehealth," and "Warm Leads"
- Surveys — Skip "Patient Exit Survey"
- Workflows — Skip unnumbered workflows (e.g., "Appointment Reminders Campaign," "New Leads Workflow," "Nurturing Workflow")
Pre-Load Cleanup — Fresh / Empty Accounts
If there are no active practices on the account, the snapshot can be loaded in full without skipping any items. However, before proceeding, ensure the following are completely deleted to prevent conflicts:
- Contacts
- Automations / Workflows
- Sites (Funnels & Websites)
- Pipelines
- Calendars
- Custom Values
Fill Out Custom Values
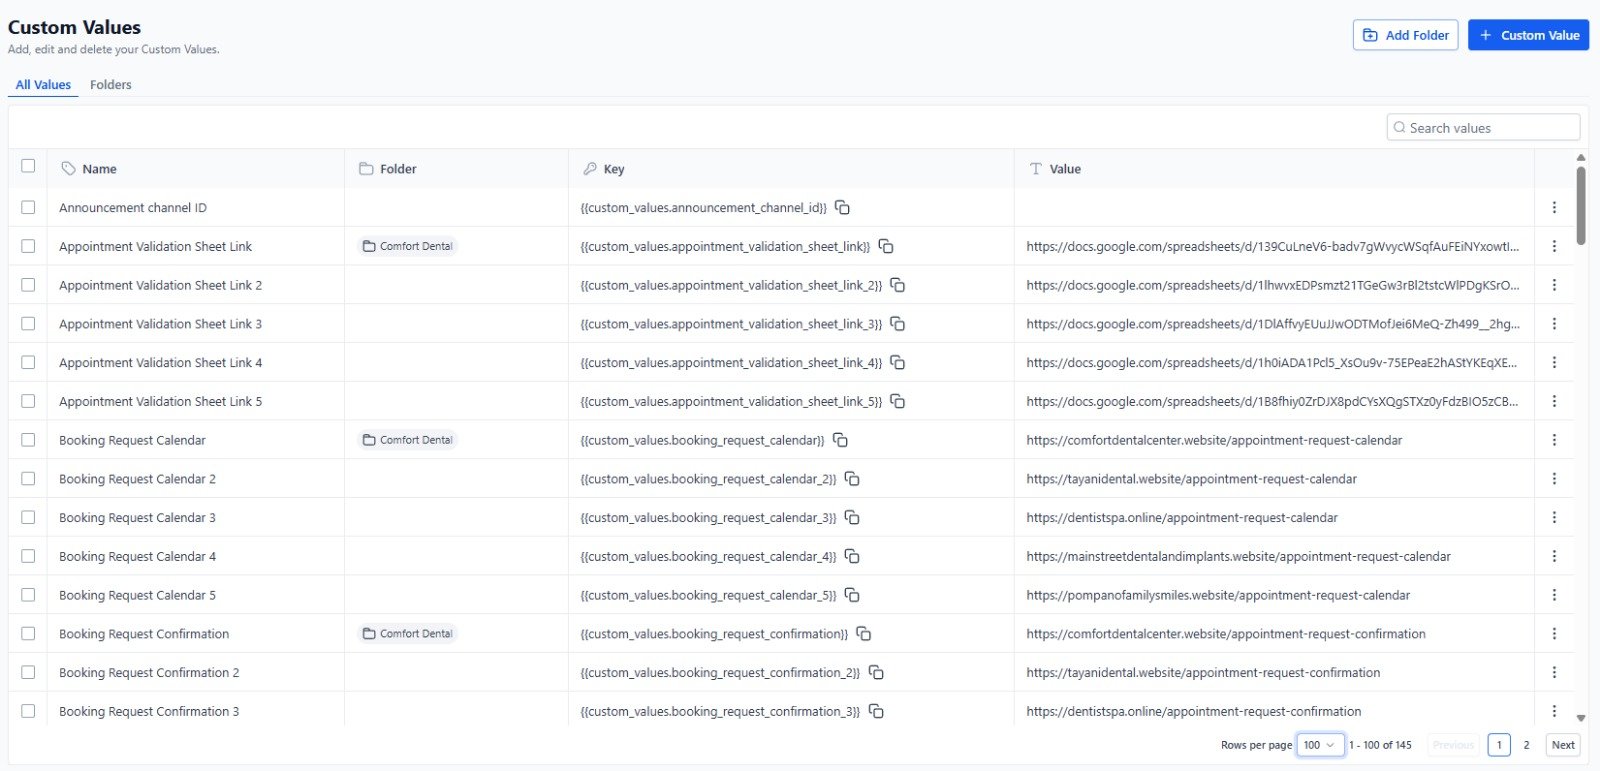
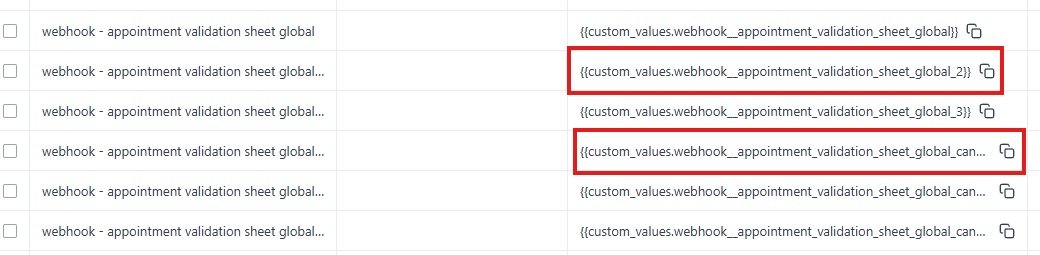
After the snapshot is loaded, navigate to Settings → Custom Values. Custom values are numbered 1 through 5, with Practice 1 using values with no number suffix and Practices 2–5 using the corresponding suffix (e.g., _2, _3, etc.).
- If only one practice is being set up, fill in only the custom values matching that practice's assigned number
- Shared custom values (no number suffix) must always be filled as they apply to all practices on the account
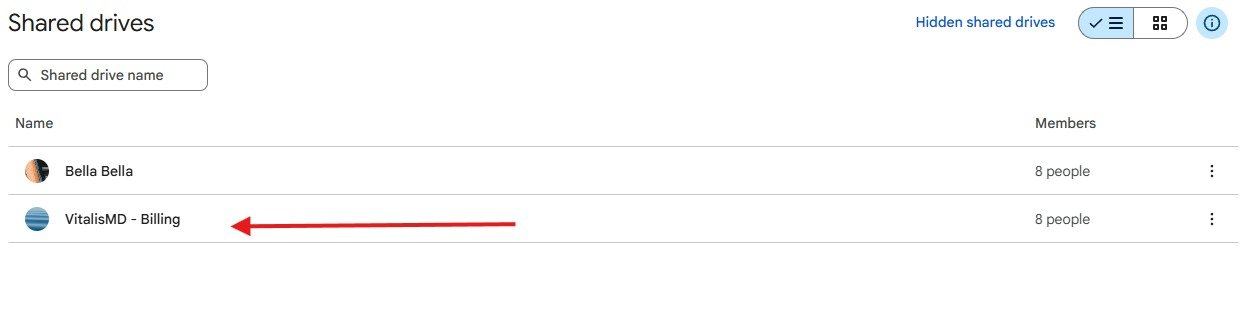
Access the VitalisMD Billing Shared Drive
The Appointment Validation Sheet Links used in the custom values are stored in the VitalisMD - Billing shared Google Drive. Navigate to Google Drive → Shared Drives and open VitalisMD - Billing.
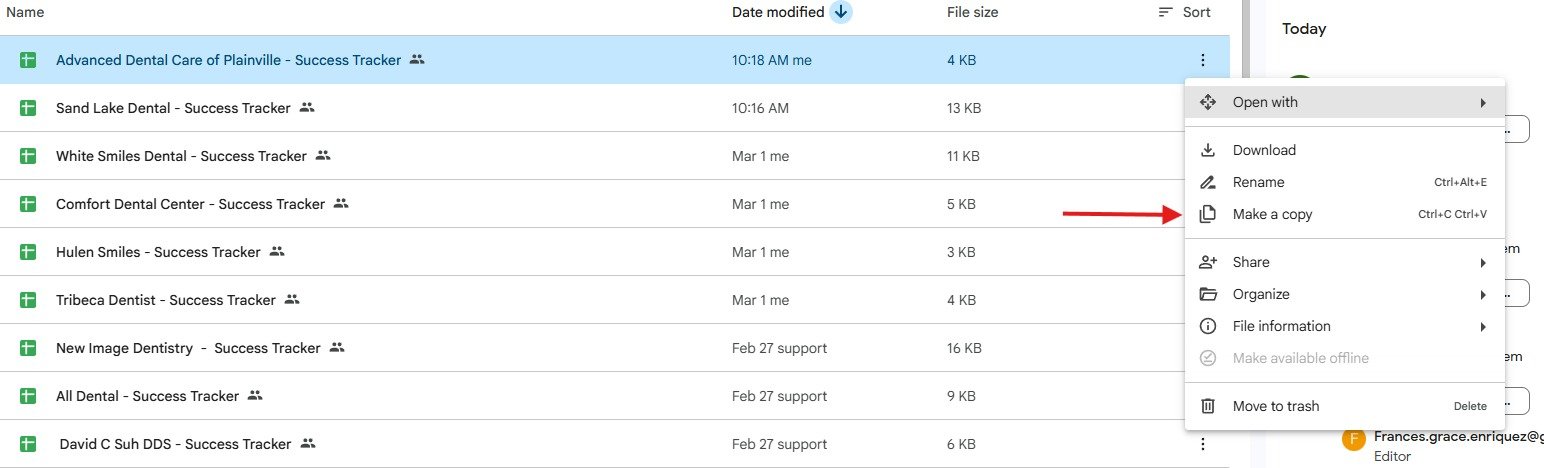
Copy an Existing Success Tracker
Right-click any existing Success Tracker and select "Make a copy". Rename the copy using the format: [Practice Name] - Success Tracker.
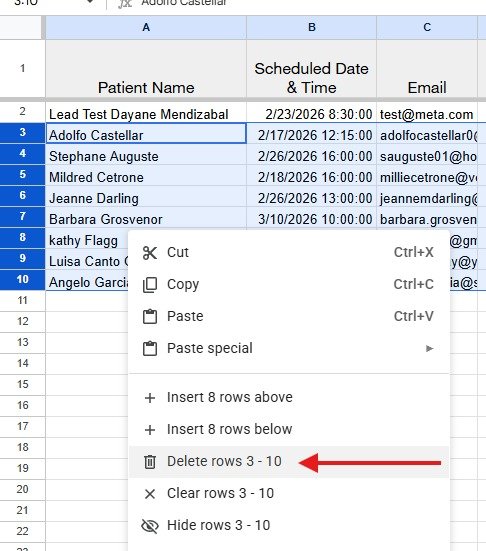
Clean Placeholder Records from the Tracker
Delete all existing records from the tracker except one. The single remaining row must be kept to preserve formatting and prevent automations from using the header row as a data entry point.
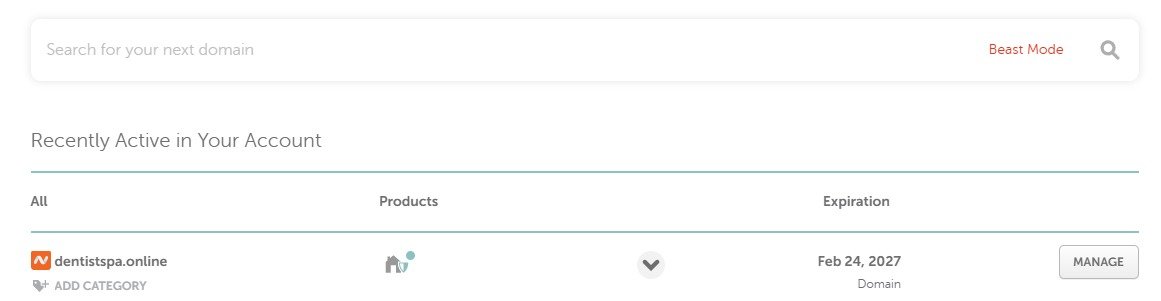
Search for a Domain on Namecheap
Navigate to Namecheap and use the search bar to find a suitable domain for the practice's landing sites and marketing campaigns.
Add the Domain to Cart
Once a suitable and available domain is confirmed (indicated by a checkmark), click "Add to cart".

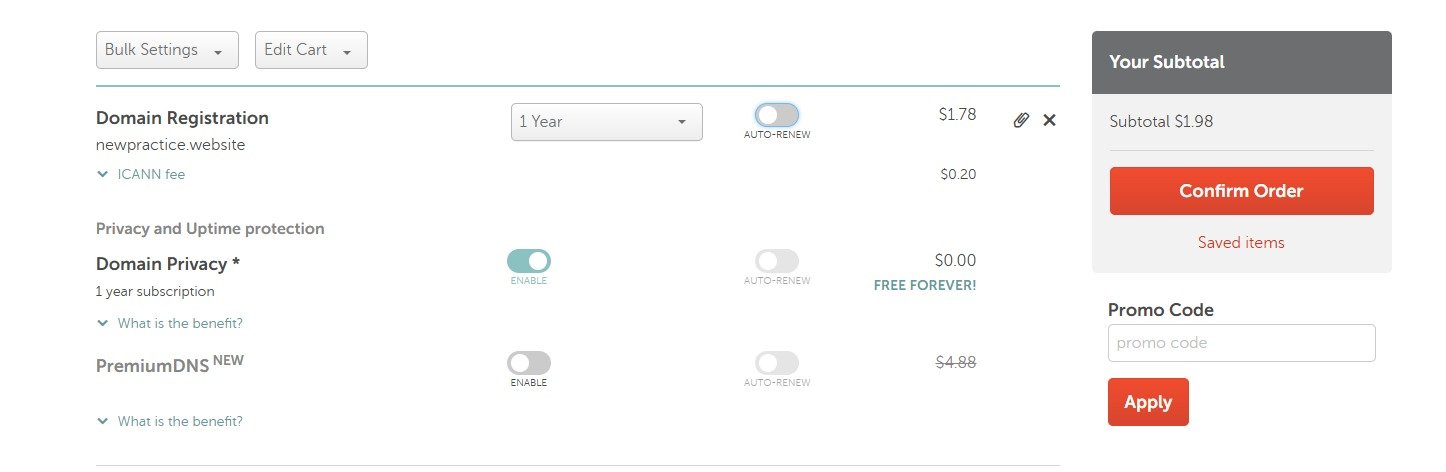
Checkout — Disable Auto-Renew & Extra Services
- Disable the Auto-Renew toggle for the domain registration
- Leave Domain Privacy enabled (free)
- Do NOT enable PremiumDNS or any other paid add-on
Click "Confirm Order" to complete the purchase.
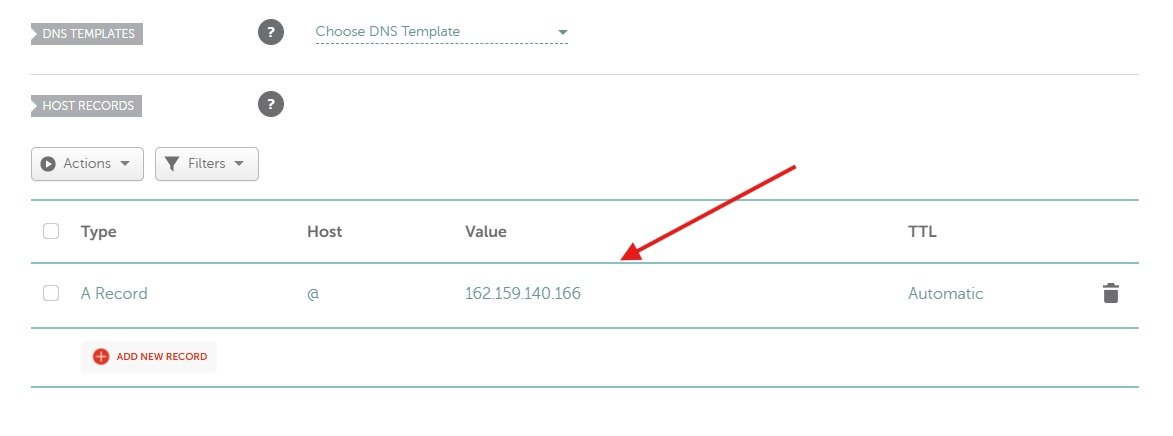
Configure Advanced DNS in Namecheap
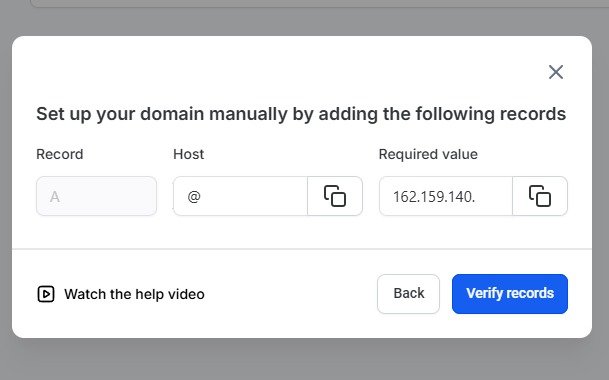
After purchase, go to Manage Domain → Advanced DNS. Delete all existing records, then add a new A Record:
| Type | Host | Value | TTL |
|---|---|---|---|
| A Record | @ | 162.159.140.166 | Automatic |
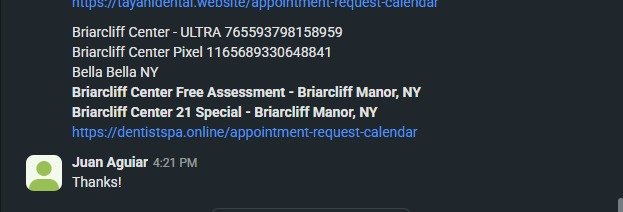
Hand Off Domain to Dayane
Once the domain is configured, hand it off to Dayane. She will provide:
- Names of the two Lead Forms going live
- The Ad Account the campaigns will run from
- The Facebook Pixel ID for tracking
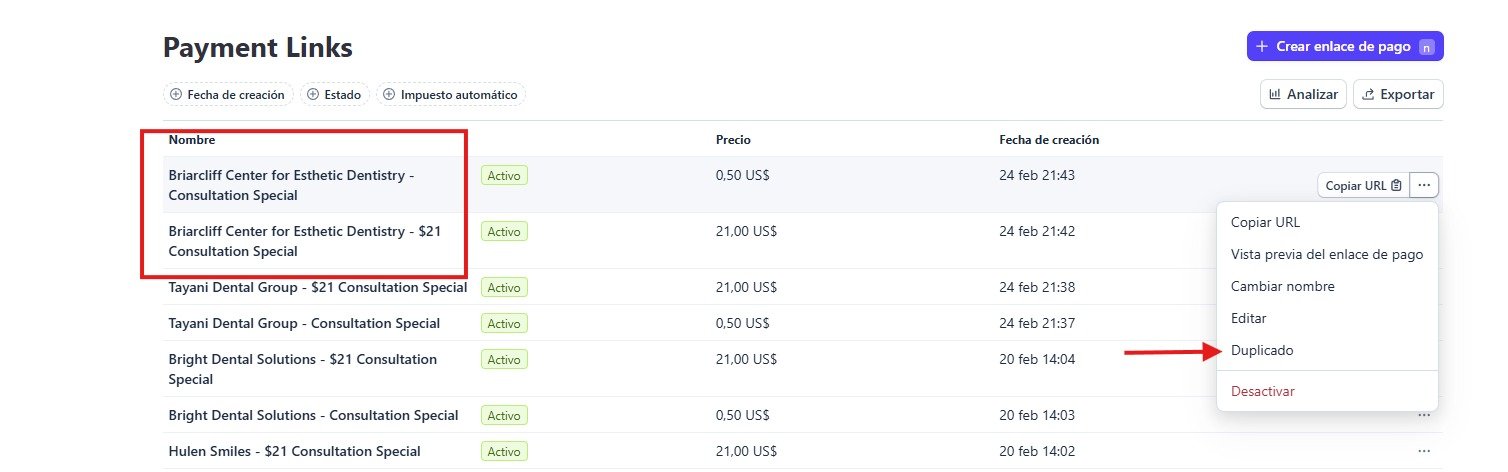
Create Payment Links
Two payment links must be created per practice. Navigate to Payment Links and duplicate an existing practice's links using the three-dot menu → Duplicado (Duplicate):
- Consultation Special — $0.50
- $21 Consultation Special — $21.00
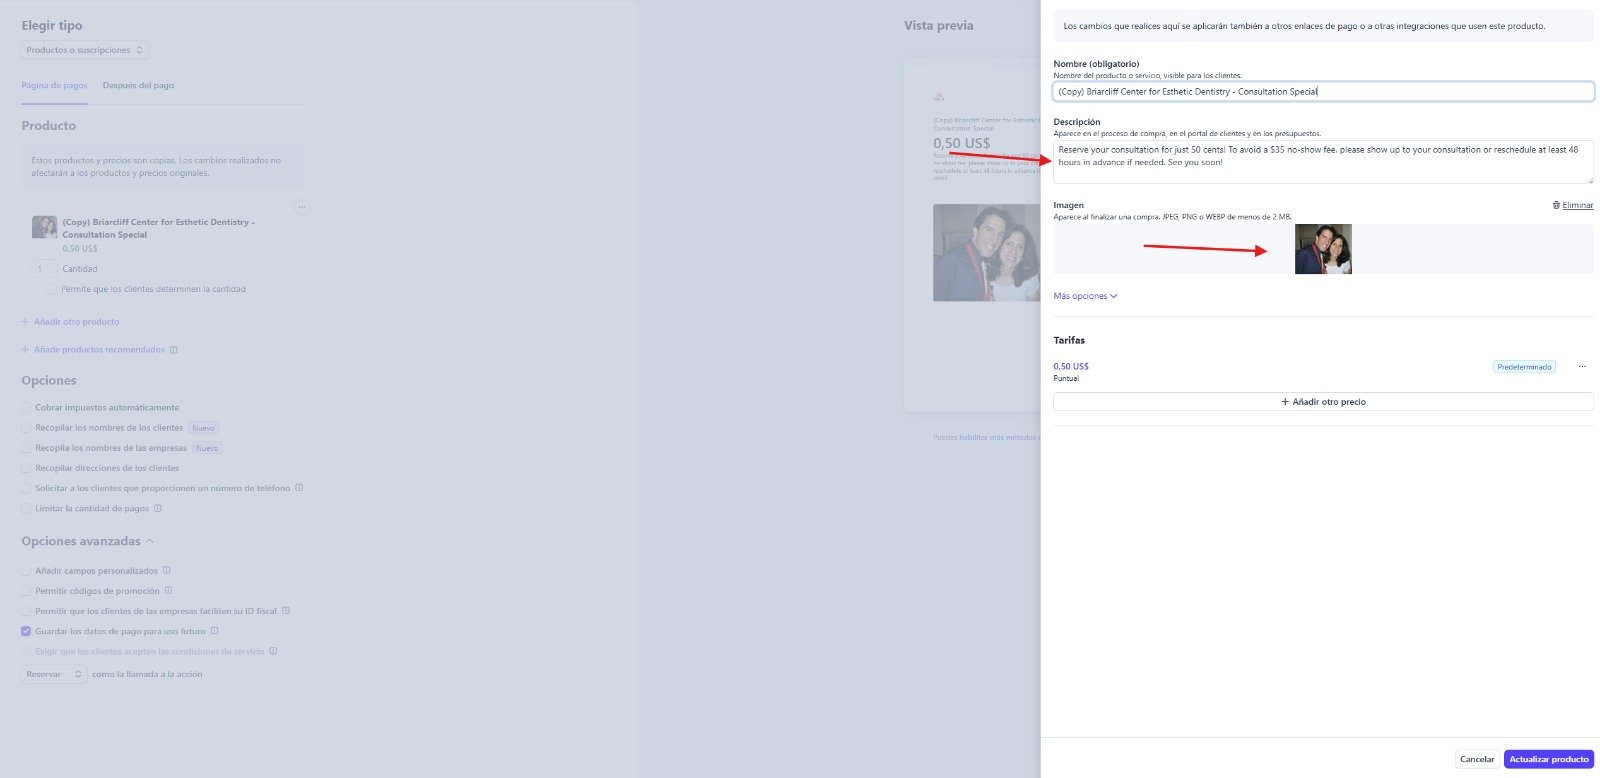
Update Payment Link Details
After duplicating, update the following fields in each link:
- Name — update to the new practice name
- Description — update to match the practice's messaging
- Image — replace with a photo representing the new practice
Click "Actualizar producto" (Update product) to save.
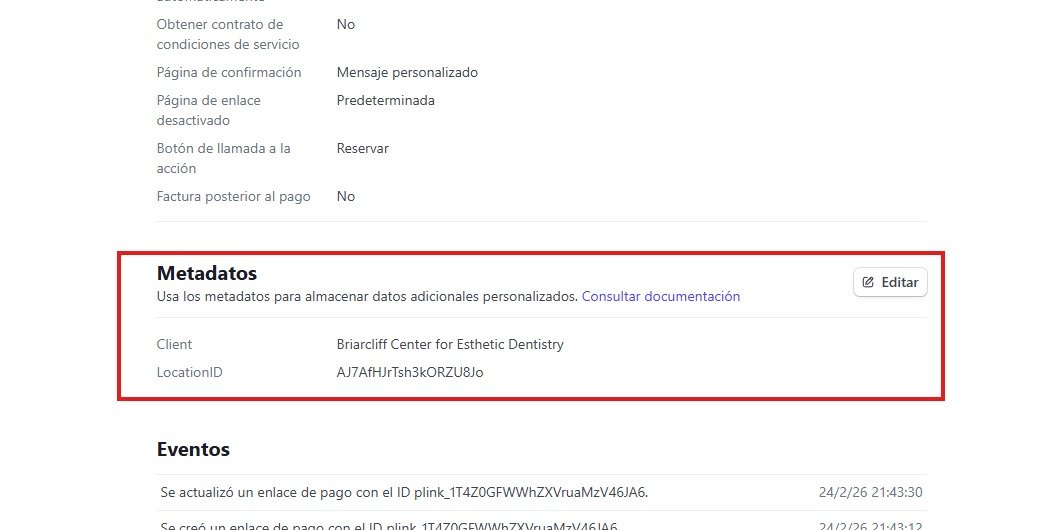
Add Metadata to Payment Links
After saving each link, scroll to the Metadata section and click "Editar" (Edit) to add:
| Field Name | Value |
|---|---|
| Client | Name of the practice |
| LocationID | GHL Location ID of the sub-account |
Timezone Adjustment Pabbly Workflow (If Required)
If the practice operates in a different timezone than the GHL account, create a Pabbly timezone conversion workflow. Name it:
[GHL Timezone] to [Practice Timezone] - [Account Name] - Global Validation S...
Replace the default webhook URL in both the Appointment Reminder Campaign and Appointment Cancelled workflow custom values with the new Pabbly webhook.
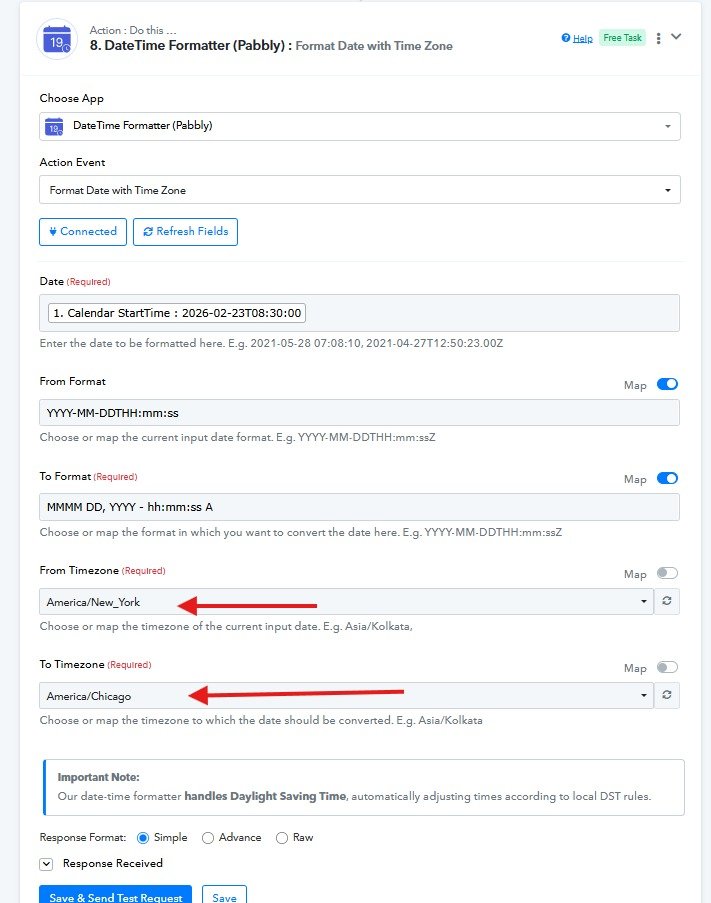
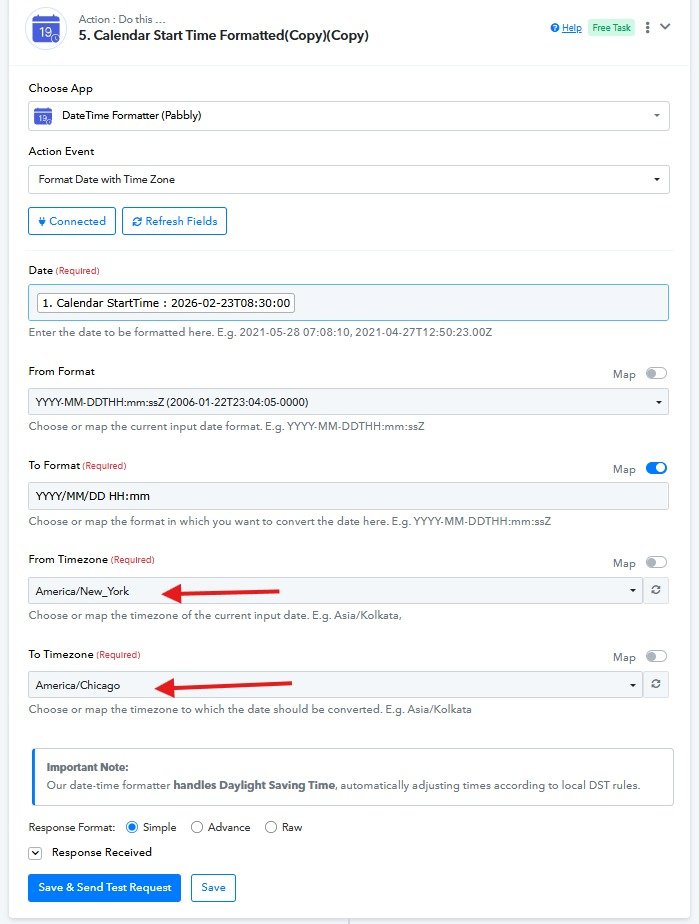
Within the workflow, update both DateTime Formatter steps:
- Step 5 — Calendar Start Time Formatted: Set From Timezone to the GHL account timezone and To Timezone to the practice timezone
- Step 8 — Format Date with Time Zone: Apply the same timezone configuration

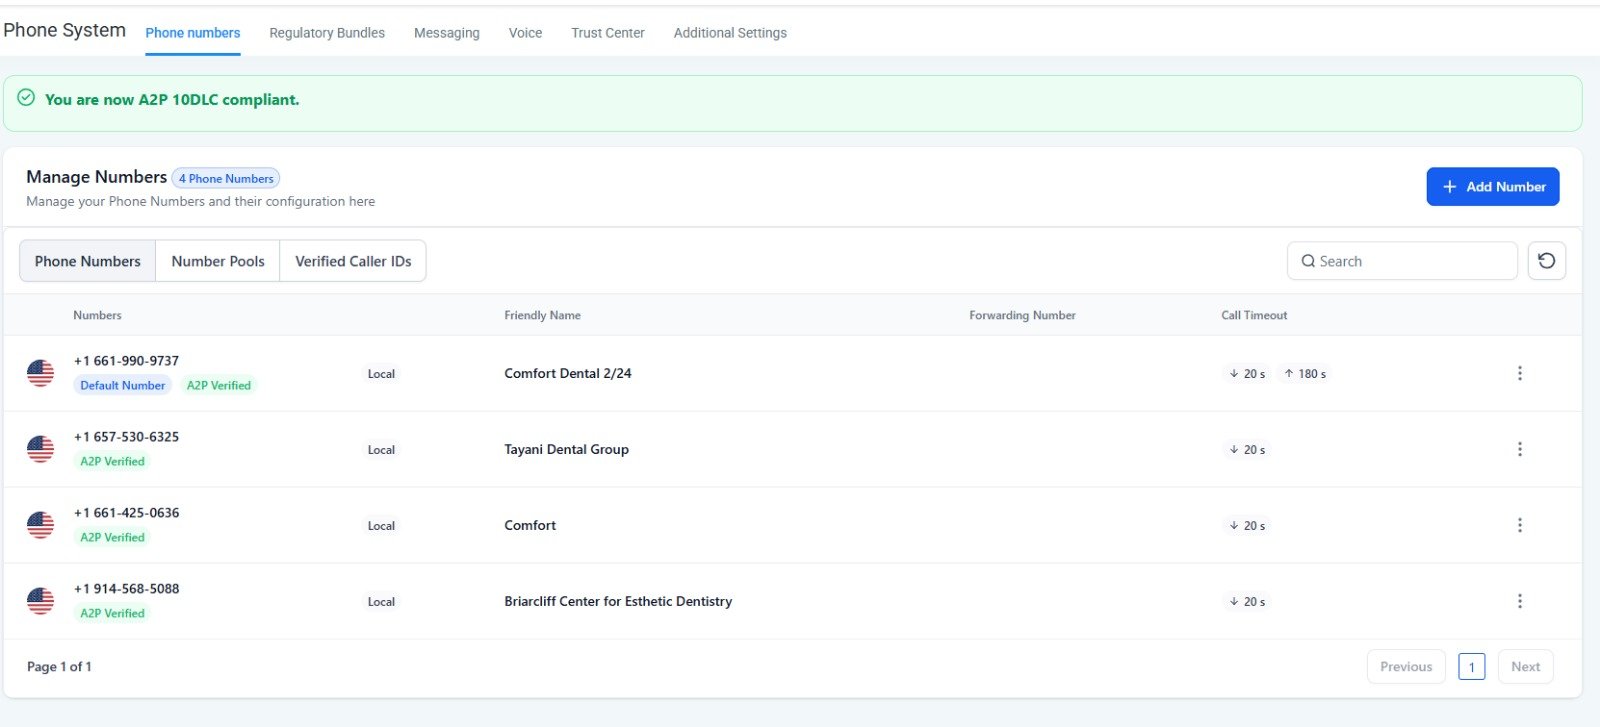
Add a Phone Number
Navigate to Settings → Phone System → Phone Numbers and click "+ Add Number". Set the Friendly Name to identify the practice.
Connect the Domain in GHL
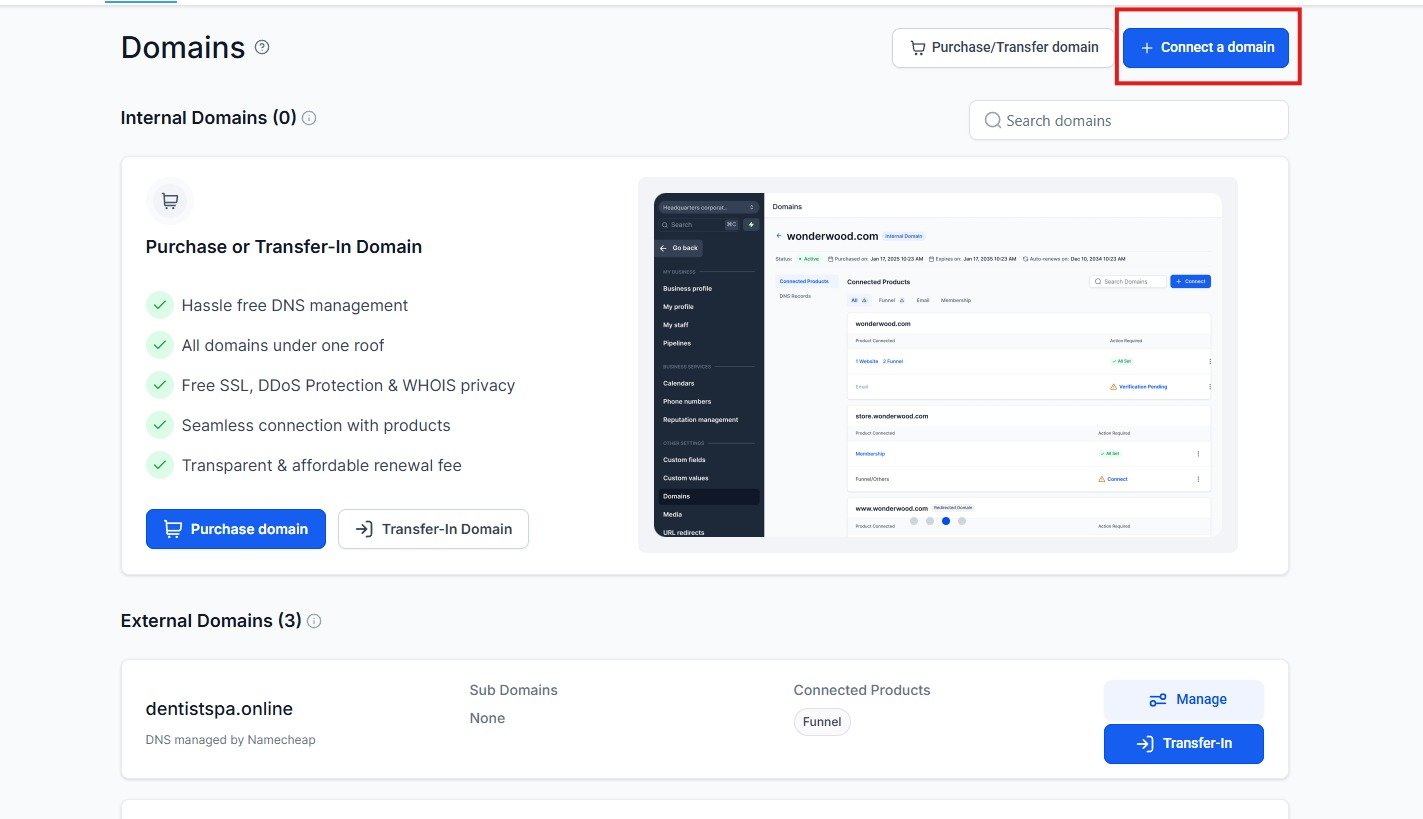
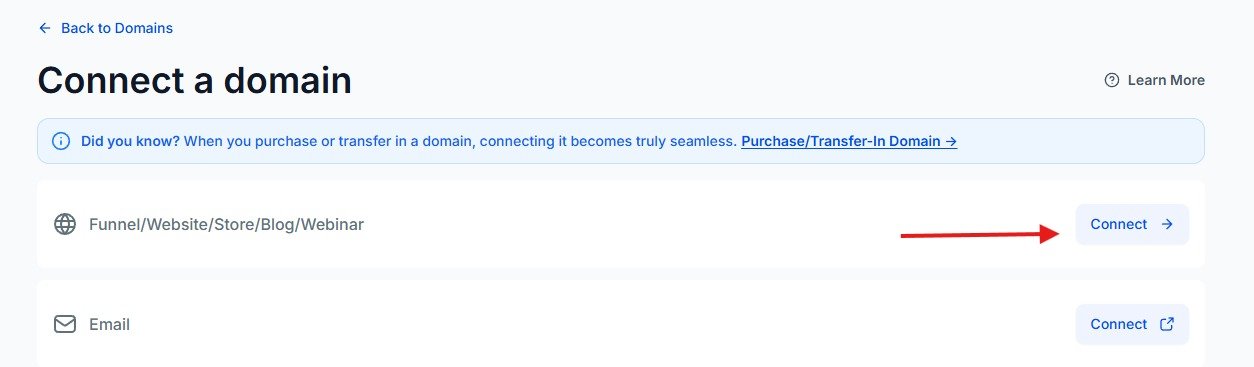
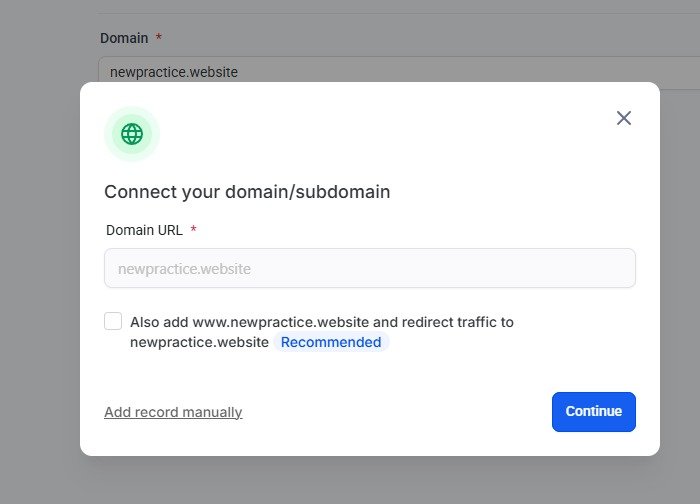
Navigate to Settings → Domains and click "+ Connect a domain":
- Select Funnel/Website/Store/Blog/Webinar → click "Connect"
- Enter the domain URL — leave "Also add www. and redirect traffic" unchecked
- Click "Continue"
- Click "Verify records" (DNS was already set up in Namecheap)
- Once verified, select the appropriate funnel to connect
Update Pipeline Names
Navigate to Pipelines and update the names to reflect the new practice. Choose a pipeline slot for a practice not currently live on the account.
Update Calendars
Navigate to Calendars and update the two calendars matching the chosen pipeline's practice name. Also update the Calendar Group name in the sidebar.
- Appointment Calendar — rename and update availability to match the appointment slots submitted by the practice
- Telehealth Appointment Calendar — rename and ensure agents Lady and Rhenallyn are assigned

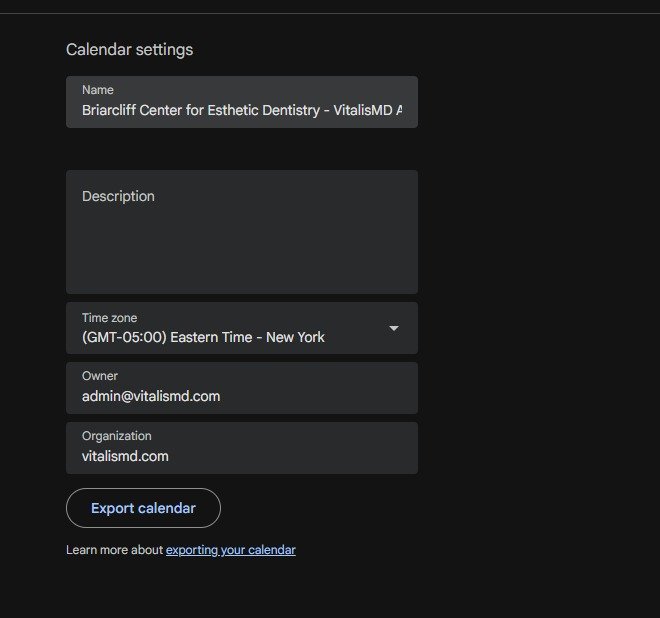
Create a Google Calendar for the Practice
Create a new Google Calendar named: [Practice Name] - VitalisMD Appointments
- Set the timezone to match the practice's location
- Invite the practice's email addresses so staff can view appointments
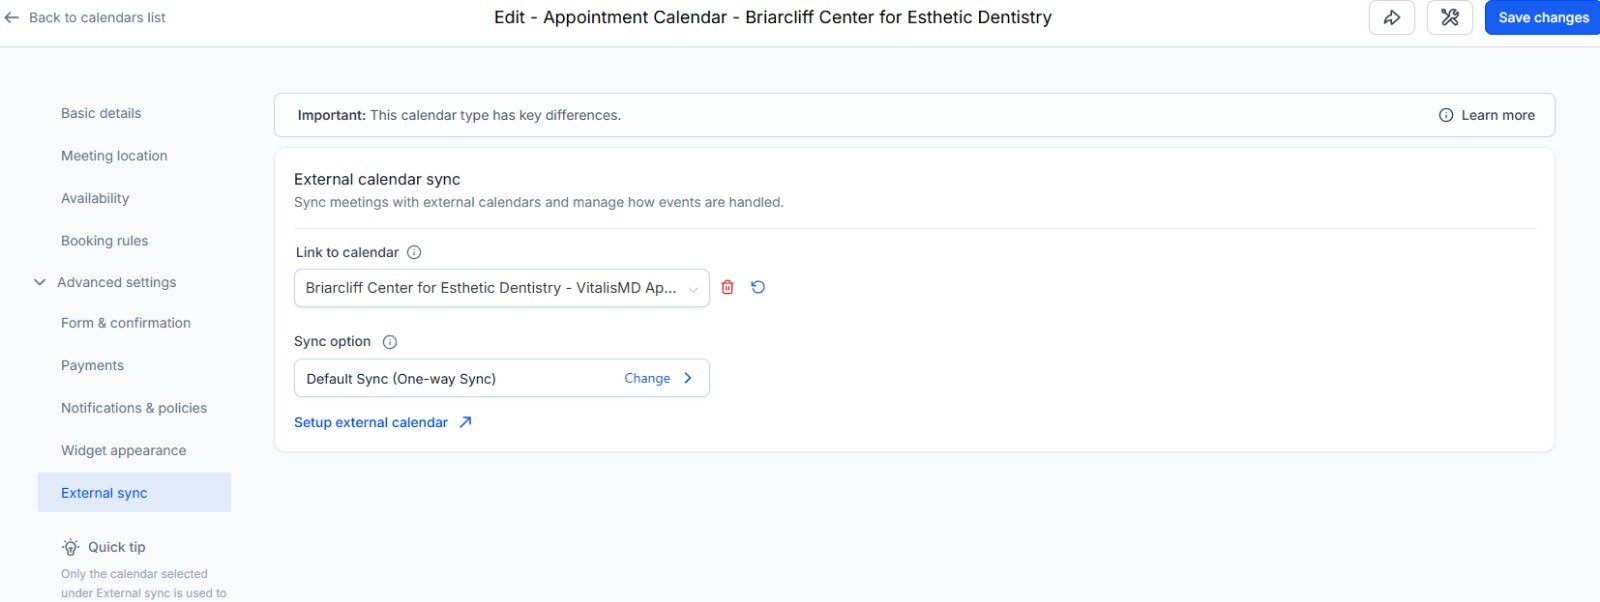
Link Google Calendar via External Sync
In the Appointment Calendar settings in GHL, go to the External Sync tab. Set Link to Calendar to the newly created Google Calendar. Leave sync as Default Sync (One-way Sync). Click "Save changes".
Create a Pabbly Workflow per Lead Form
A Pabbly workflow must be created for each lead form going live. Name using the convention:
FB to HL - Lead Form - [Practice Name] [State] - [Campaign Name]

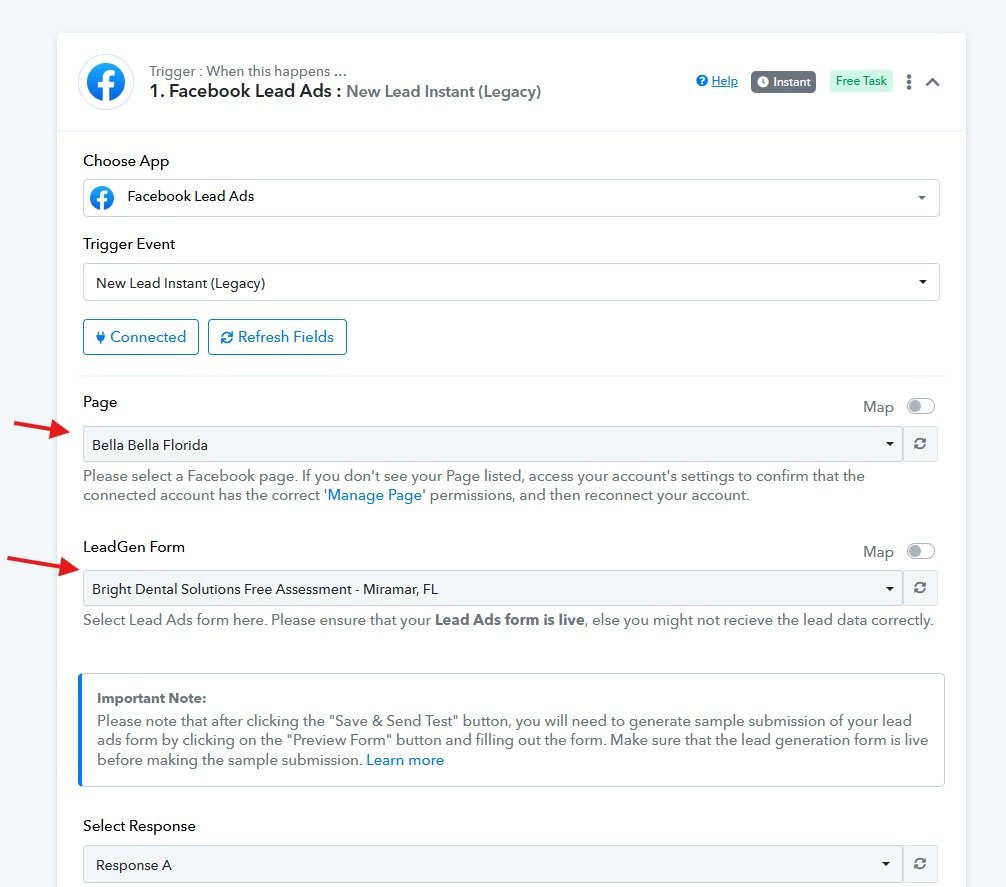
Update the Facebook Lead Ads Trigger
Update the trigger step with:
- Page — the practice's Facebook page
- LeadGen Form — the specific form provided by Dayane
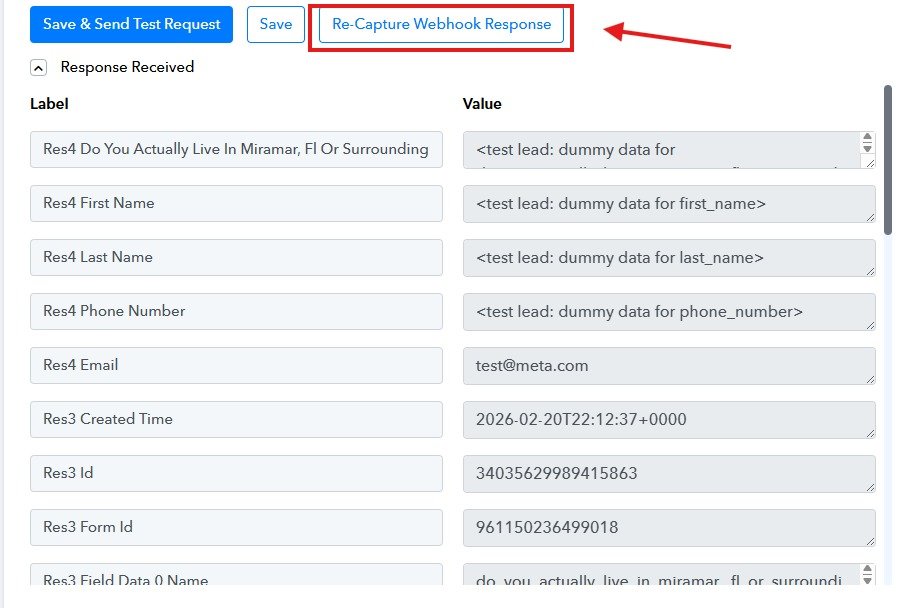
Re-Capture Webhook Response
After updating the trigger, click "Re-Capture Webhook Response" to capture a fresh response from the new form, ensuring all fields are properly mapped throughout the workflow.
Update Router Filter Conditions
Route 1 (Qualified Leads): Update Select Label to map to the location qualifier question from the new form. Filter Type: Equal to / Value: yes.
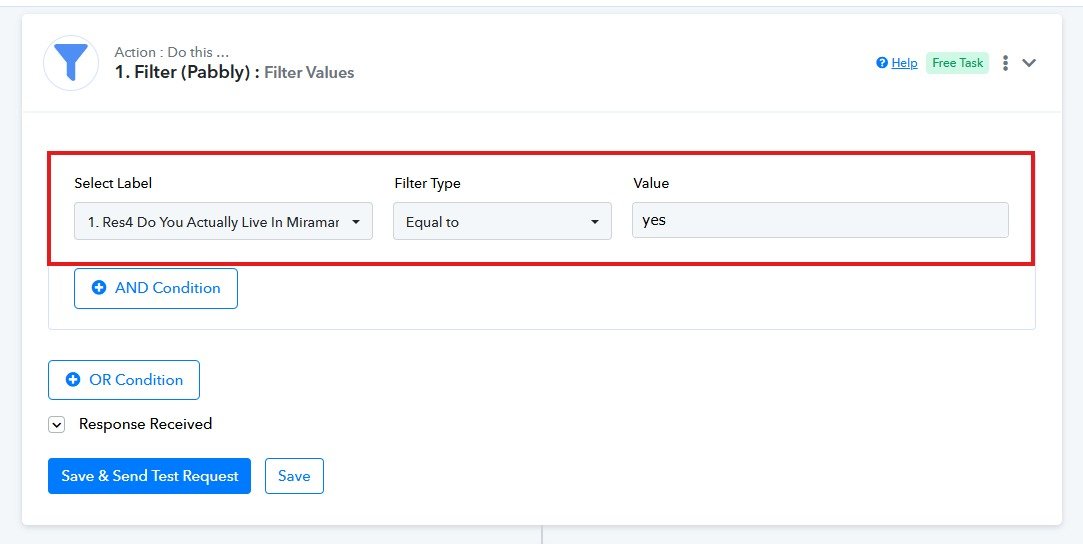
Route 2 (Disqualified Leads): Update the same field for Route 2. Filter Type: Equal to / Value: no.

Update the Get Pipelines Step
Update the GHL connection to the correct sub-account, then re-execute the step to retrieve the correct pipeline and stage IDs for the new practice.
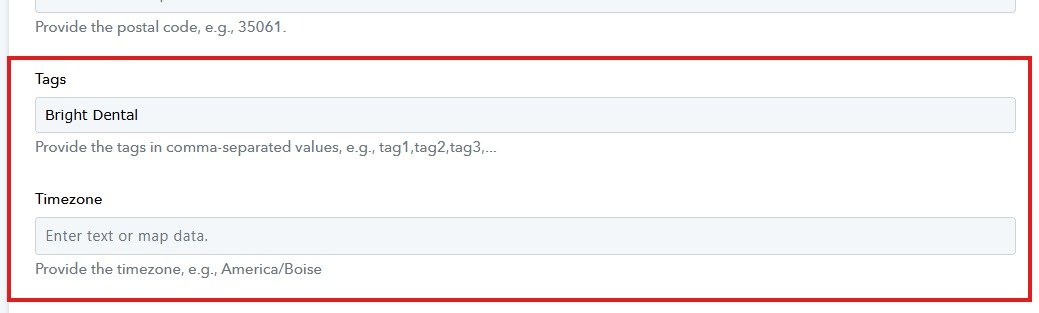
Update the Create Contact Step
- Tags — add the new practice's tag so agents can identify which practice a lead comes from
- Timezone — if the practice has a different timezone than the GHL account, enter it here (e.g.,
America/Chicago)
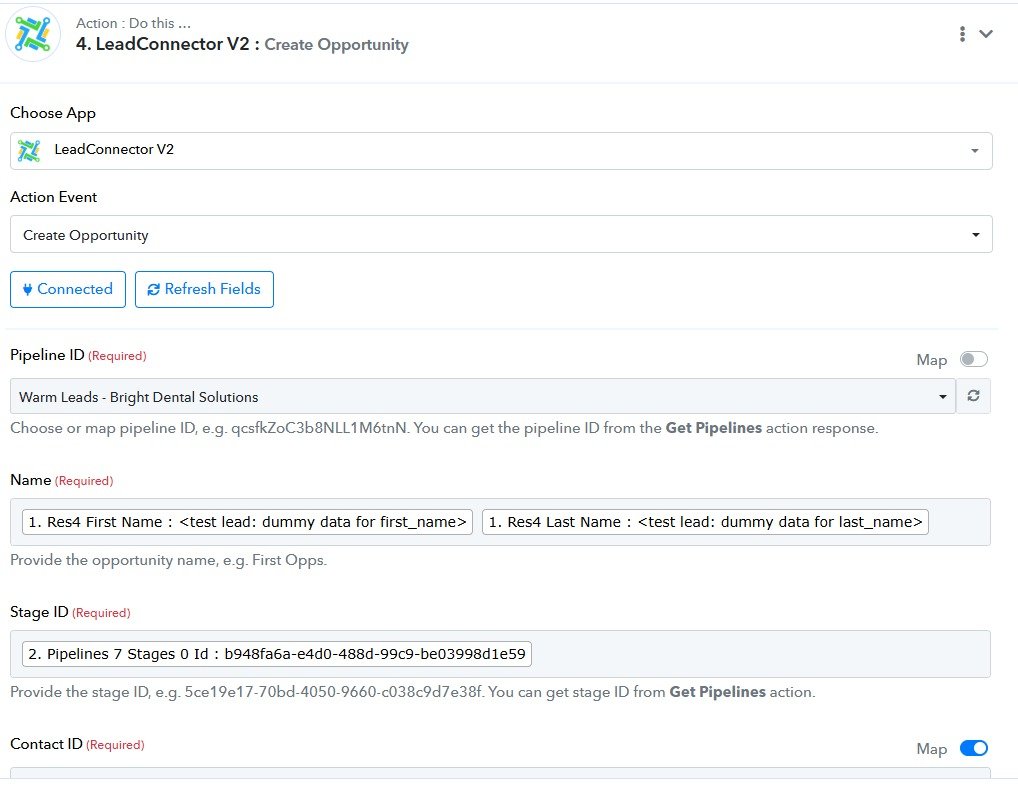
Update the Create Opportunity Step
- Pipeline ID — select the correct Warm Leads pipeline for the practice
- Stage ID — map from the Get Pipelines step output
- Name — map from lead form First Name and Last Name
- Contact ID — map from the previously created contact
Once all steps are configured, execute them in order — the test lead should appear in GHL.

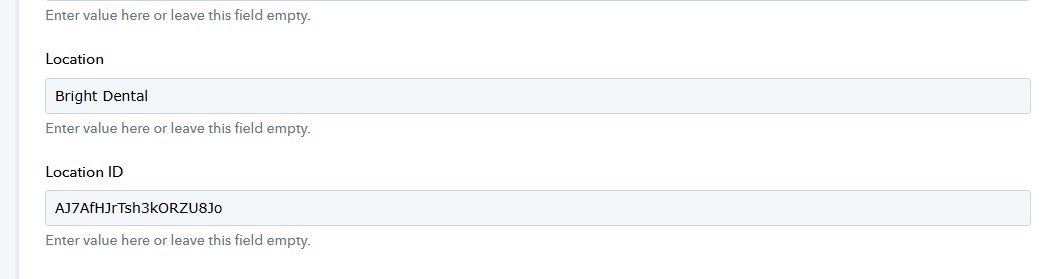
Update Google Sheets Step (Route 2)
- Location — enter the practice name
- Location ID — enter the GHL Location ID
Update Funnels & Sites
Navigate to Sites → Funnels and open the folder matching the chosen practice. Each folder contains 4 funnels.
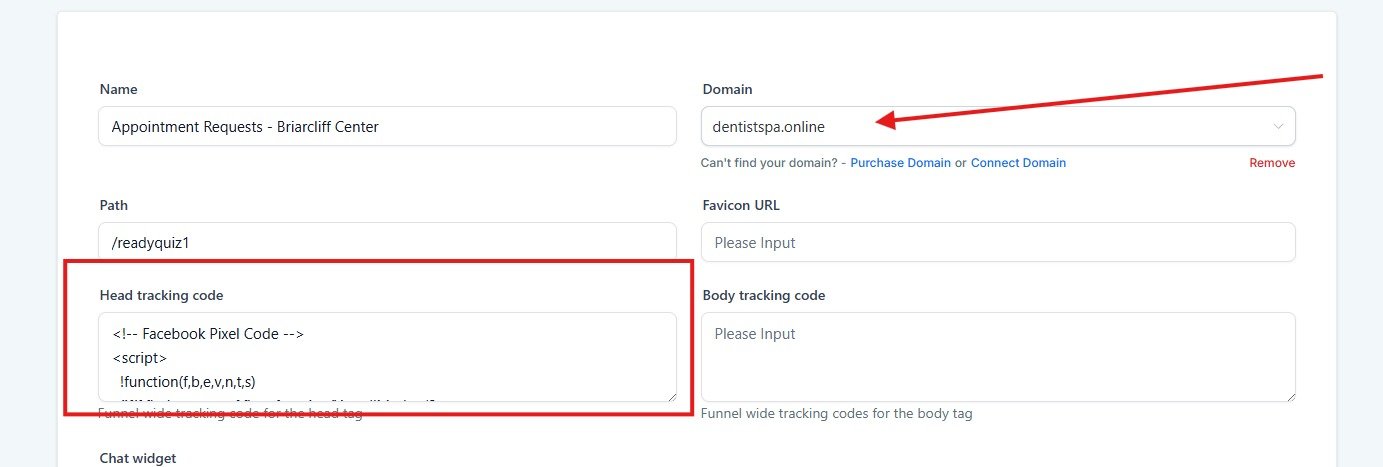
All Funnels — Settings Update:
- Update the Domain to the newly purchased practice domain
- Insert the Facebook Pixel tracking code in the Head Tracking Code field, replacing
[pixel]with the actual Pixel ID provided by Dayane (appears twice in the snippet)
<!-- Facebook Pixel Code -->
<script>
  !function(f,b,e,v,n,t,s)
  {if(f.fbq)return;n=f.fbq=function(){n.callMethod?
  n.callMethod.apply(n,arguments):n.queue.push(arguments)};
  if(!f._fbq)f._fbq=n;n.push=n;n.loaded=!0;n.version='2.0';
  n.queue=[];t=b.createElement(e);t.async=!0;
  t.src=v;s=b.getElementsByTagName(e)[0];
  s.parentNode.insertBefore(t,s)}(window, document,'script',
  'https://connect.facebook.net/en_US/fbevents.js');
  fbq('init', '[pixel]');
  fbq('track', 'PageView');
</script>
<noscript><img height="1" width="1" style="display:none"
  src="https://www.facebook.com/tr?id=[pixel]&ev=PageView&noscript=1"
/></noscript>
<!-- End Facebook Pixel Code -->
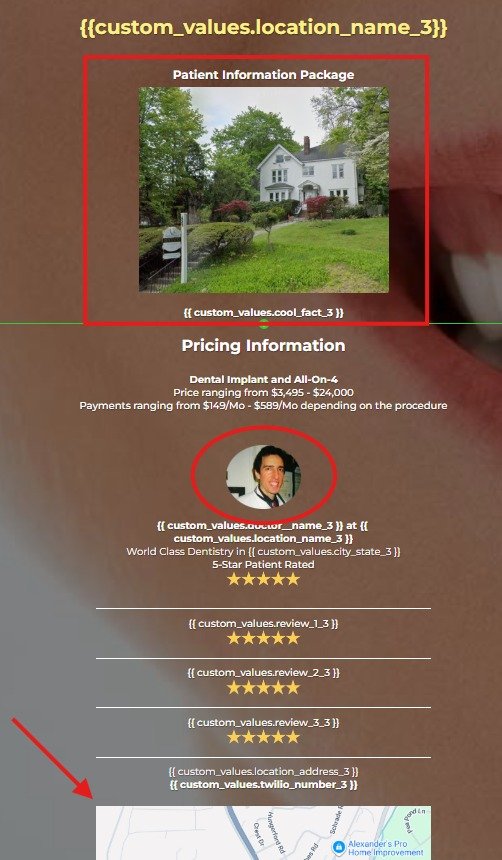
Appointment Requests & Phone Evaluations — Image Updates:
- Main/hero image (Patient Information Package)
- Doctor/provider photo (circular image)
- Map image (practice location at the bottom)
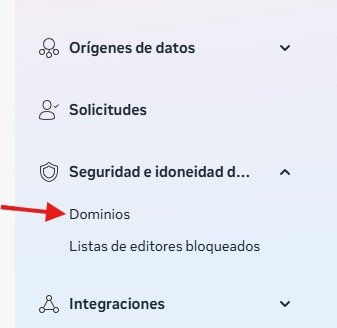
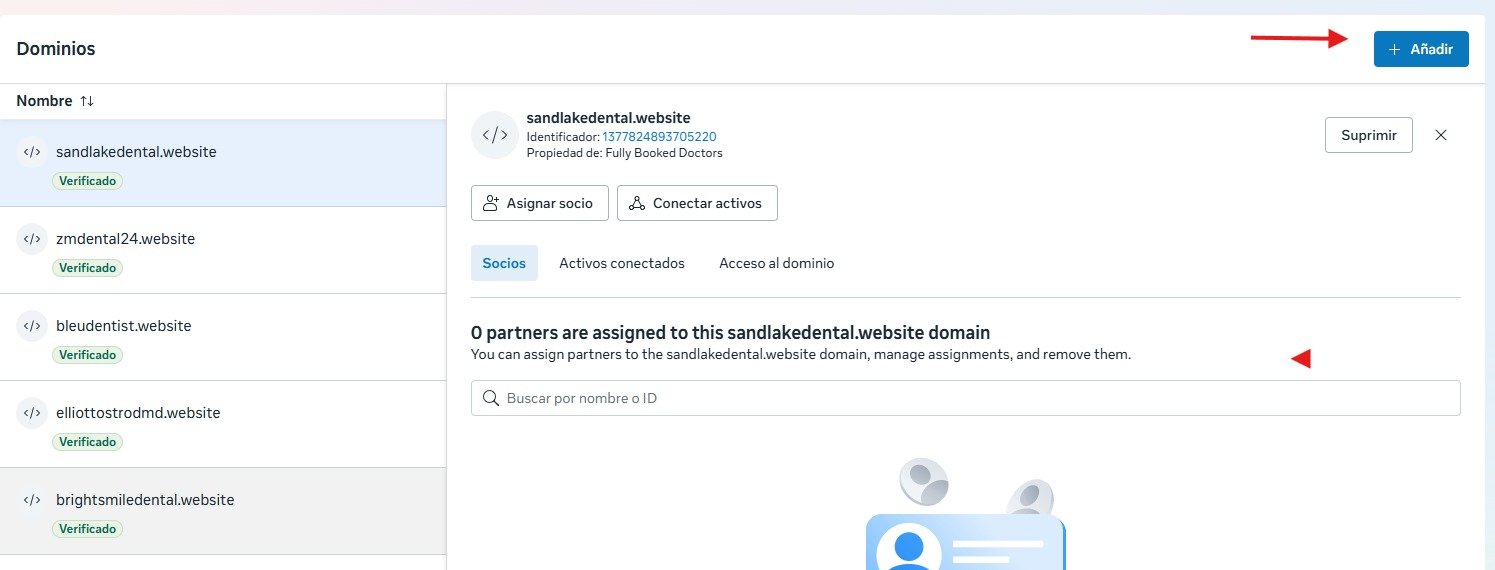
Meta Business Suite — Domain Verification
In Meta Business Suite, go to Safety Settings → Domains. Click "+ Añadir" and follow Meta's domain verification steps by adding a TXT record in Namecheap. Once propagated, the domain will show as "Verificado" (Verified).
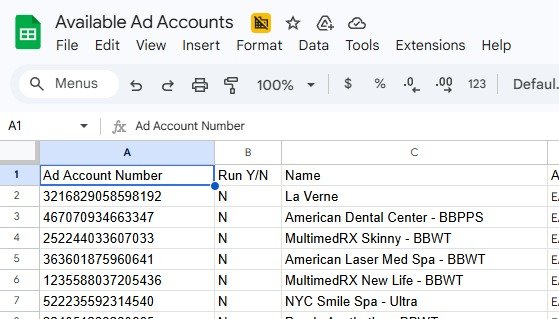
Update the Available Ad Accounts Sheet
Navigate to the Available Ad Accounts Google Sheet, locate the ad account number provided by Dayane, and update the Name column to reflect the practice being onboarded.
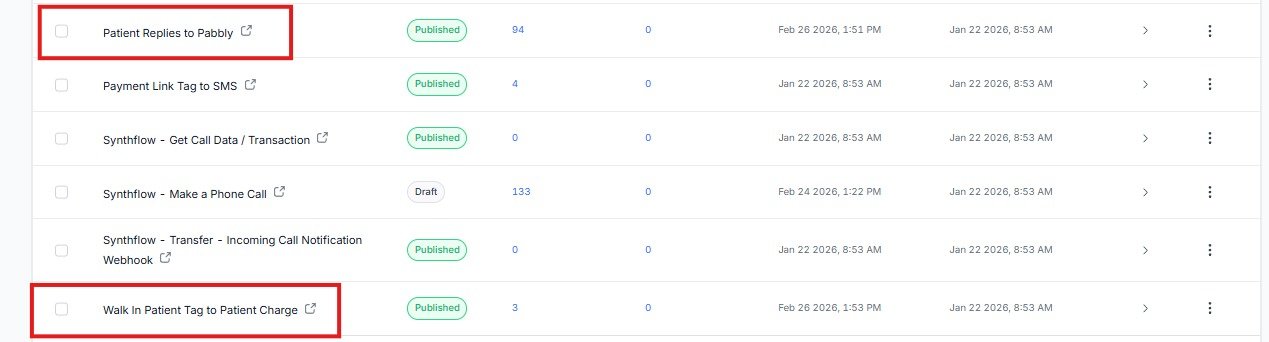
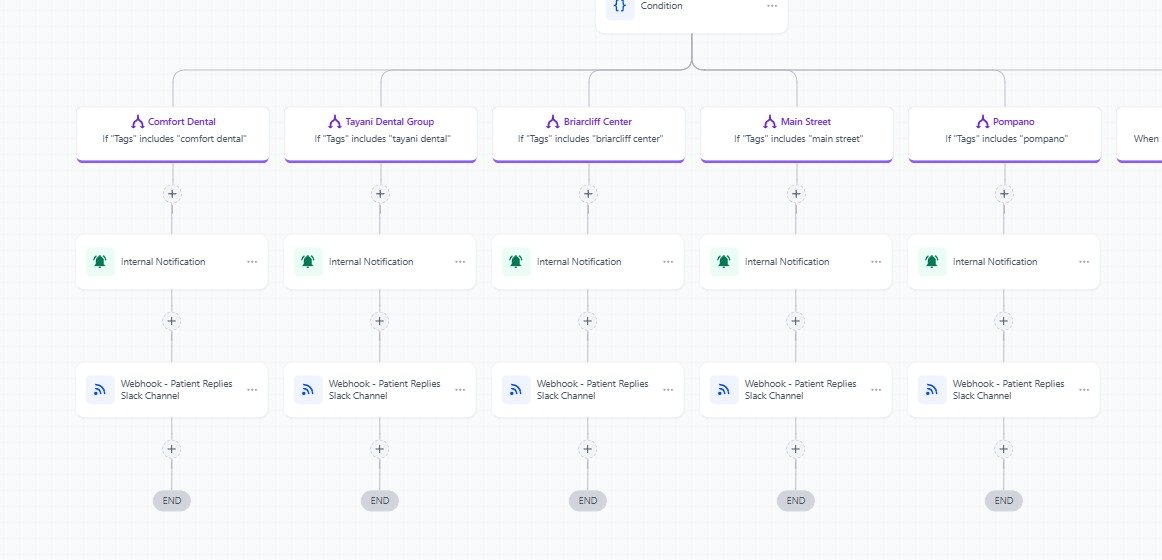
Update Shared Workflows
In Automations, locate these two shared workflows (outside any practice folder) and add a new condition branch for the new practice:
- Patient Replies to Pabbly
- Walk In Patient Tag to Patient Charge
For each new branch update:
- Condition — "Tags includes [new practice tag]"
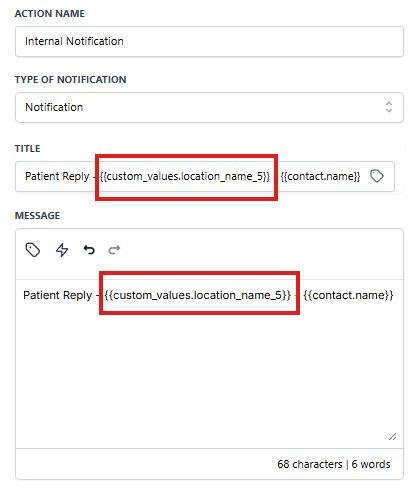
- Internal Notification — Title and Message must use the correctly numbered
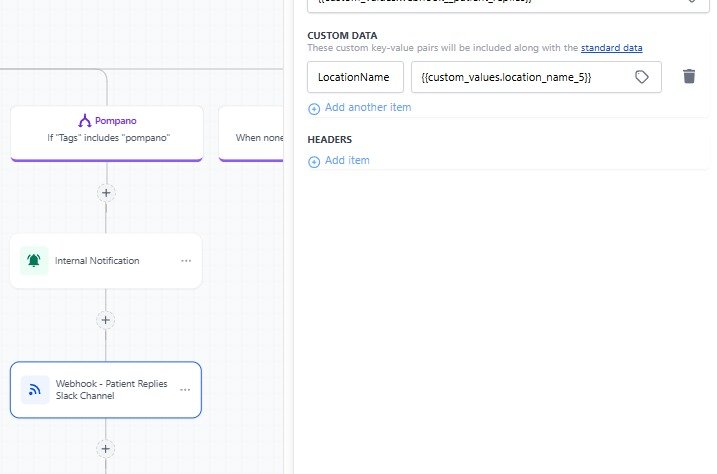
location_namecustom value (e.g.,) - Webhook - Patient Replies Slack Channel — update LocationName Custom Data to the same numbered custom value
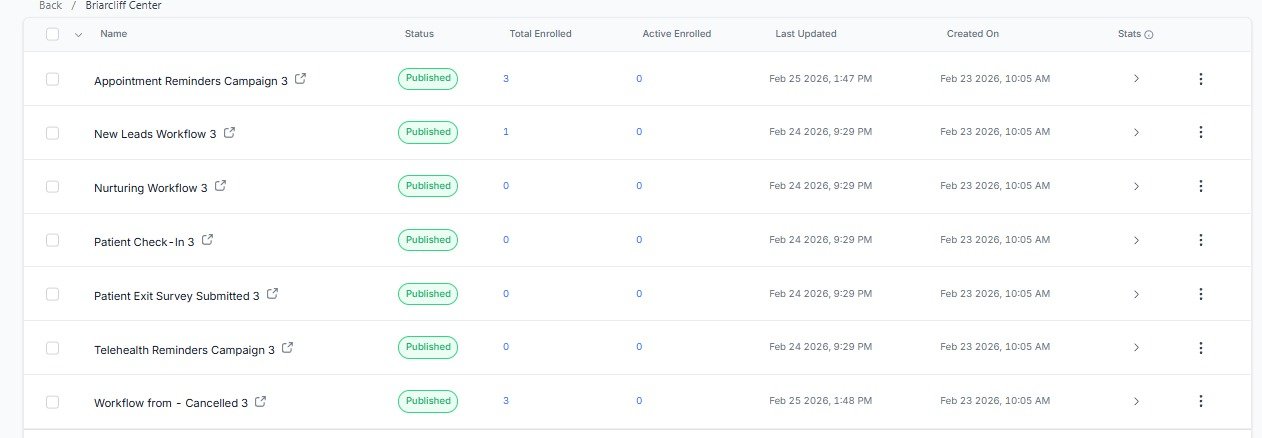
Update Practice-Specific Workflows
Navigate to the workflow folder matching the chosen practice. All workflows should be published. The only one requiring extensive editing is the Appointment Reminders Campaign.
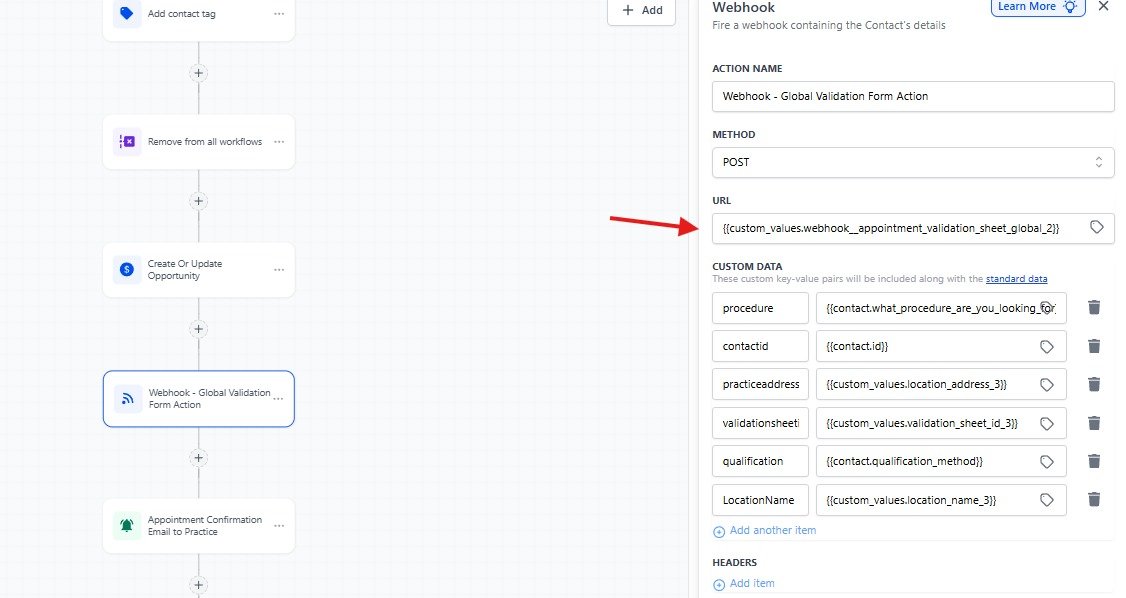
Webhook — Global Validation Form Action (Appointment Reminders & Cancelled Workflow): Verify the webhook URL custom value is correct for the practice's timezone. If different from the GHL account, replace with the Pabbly timezone-adjusted webhook. Ensure all Custom Data fields use the correctly numbered custom values.
Appointment Reminders Campaign — Content Updates:
- Before & Afters — replace with practice before/after images
- 1 Day Before — update with exterior image and patient testimonials
- Email 3 — update with exterior image and testimonials
- 4 Hours Before SMS — update with practice-specific content

Verify the Test Lead in GHL
Verify the test contact was created correctly in GHL with:
- Correct contact name, email, and phone number
- Opportunity created in the correct pipeline at the New Leads Warm Campaign stage

Create Practice Timezone Contact (If Applicable)
If the practice is in a different timezone than the GHL account, before booking the test appointment:
- Create a contact using the email address that will receive practice communications
- Set the contact's timezone to the practice's actual timezone
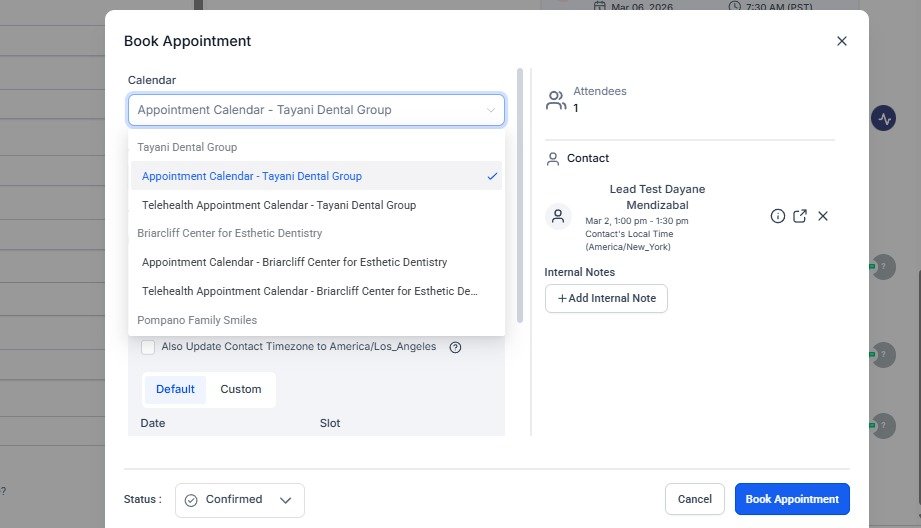
Book a Test Appointment
From the test lead's contact record, book an appointment using the correct Appointment Calendar for the practice.
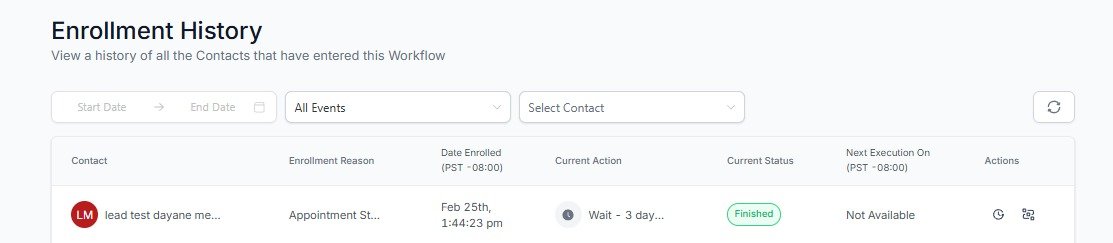
Manually Execute All Automation Steps
After booking, manually execute all automation steps for the test contact. Monitor progress in the Enrollment History of each workflow — the contact should show as "Finished" or actively progressing through wait steps.
Final Review & Campaign Launch
- Ask Rochelle to review the full setup and confirm everything is functioning correctly
- Once Rochelle approves, the account is confirmed ready for launch
- Notify Dayane to proceed with launching the ad campaigns